

The Instrument : Part 1
Instrument
Noun.
- A tool or implement.
- An object or device producing musical sounds.
For the past year I worked on designing, building, and programming my instrument. It had its ups and downs but in the end I learned a lot of things I didn't know before and was rewarded with something that inspired me to create something new.
I wanted to have an instrument that not only allowed me to perform field recordings but also to mix and create an experience in a live setting. Above all else it should fit in my studio, be portable, be reliable, and be within budget.
This post will be split into two parts.
In the beginning...
Problem #1: Too limited
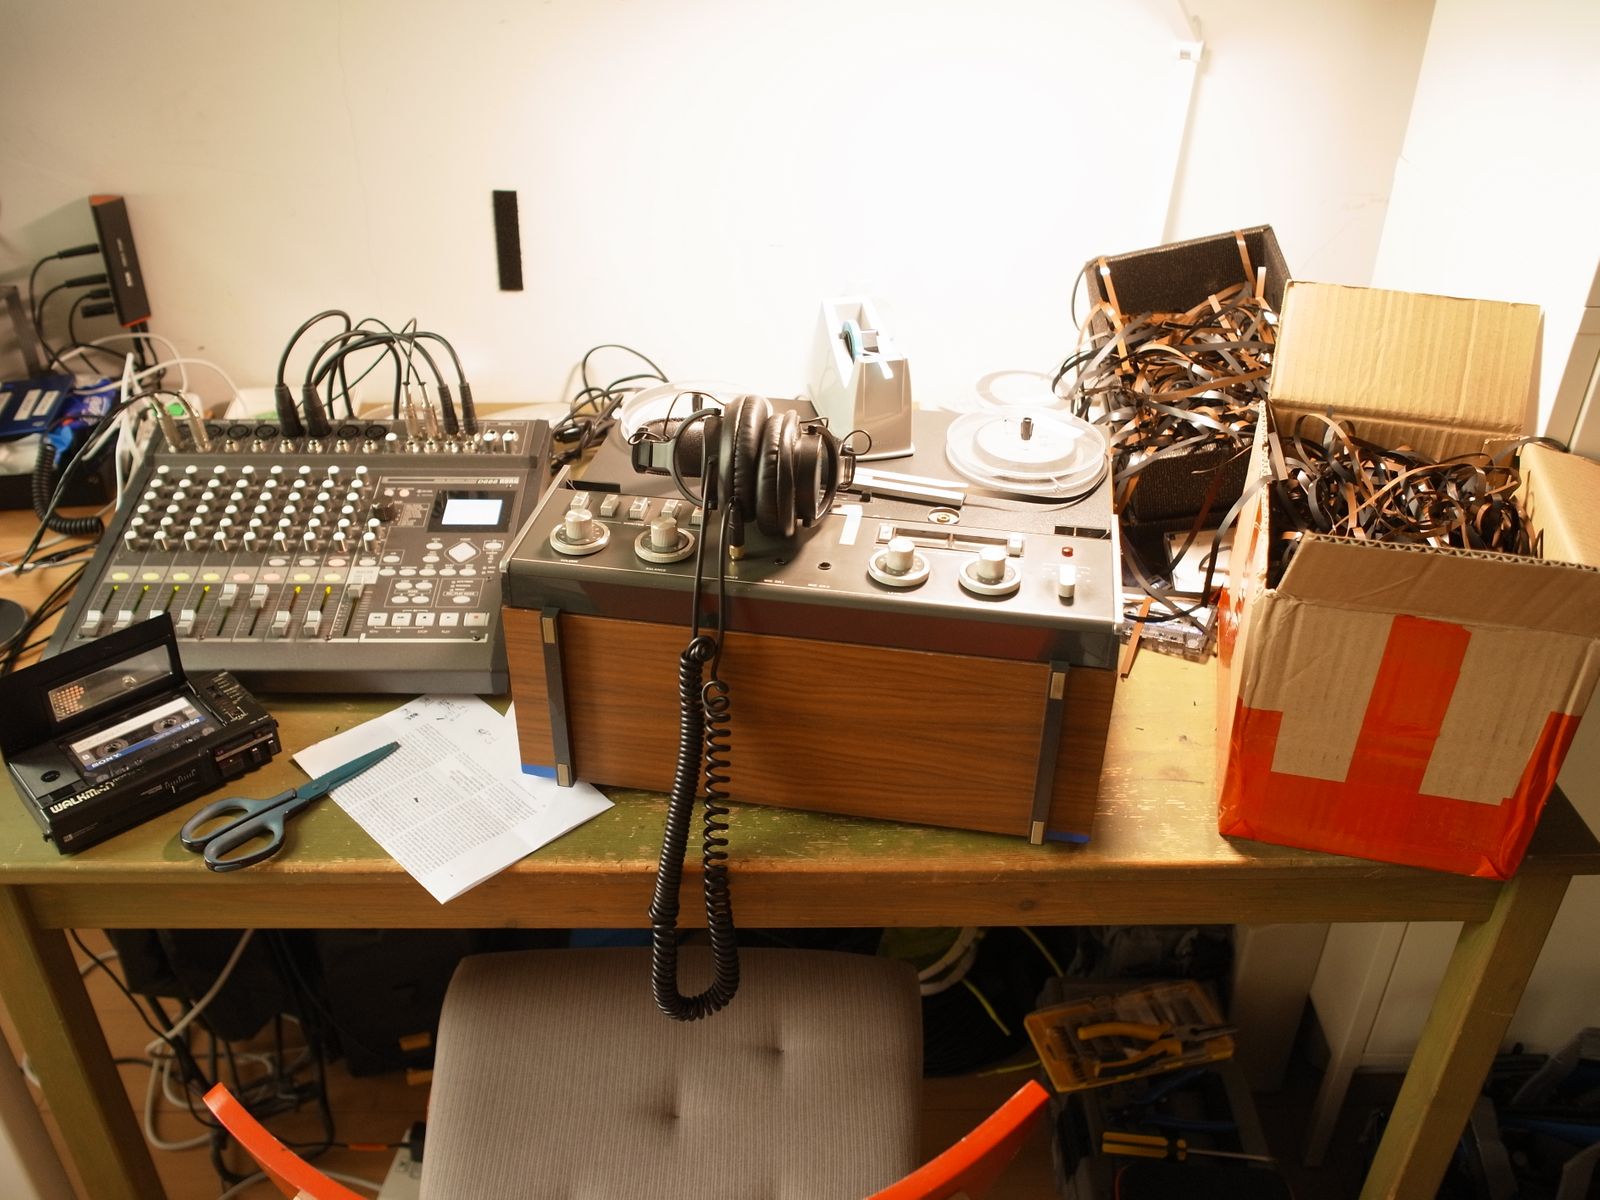
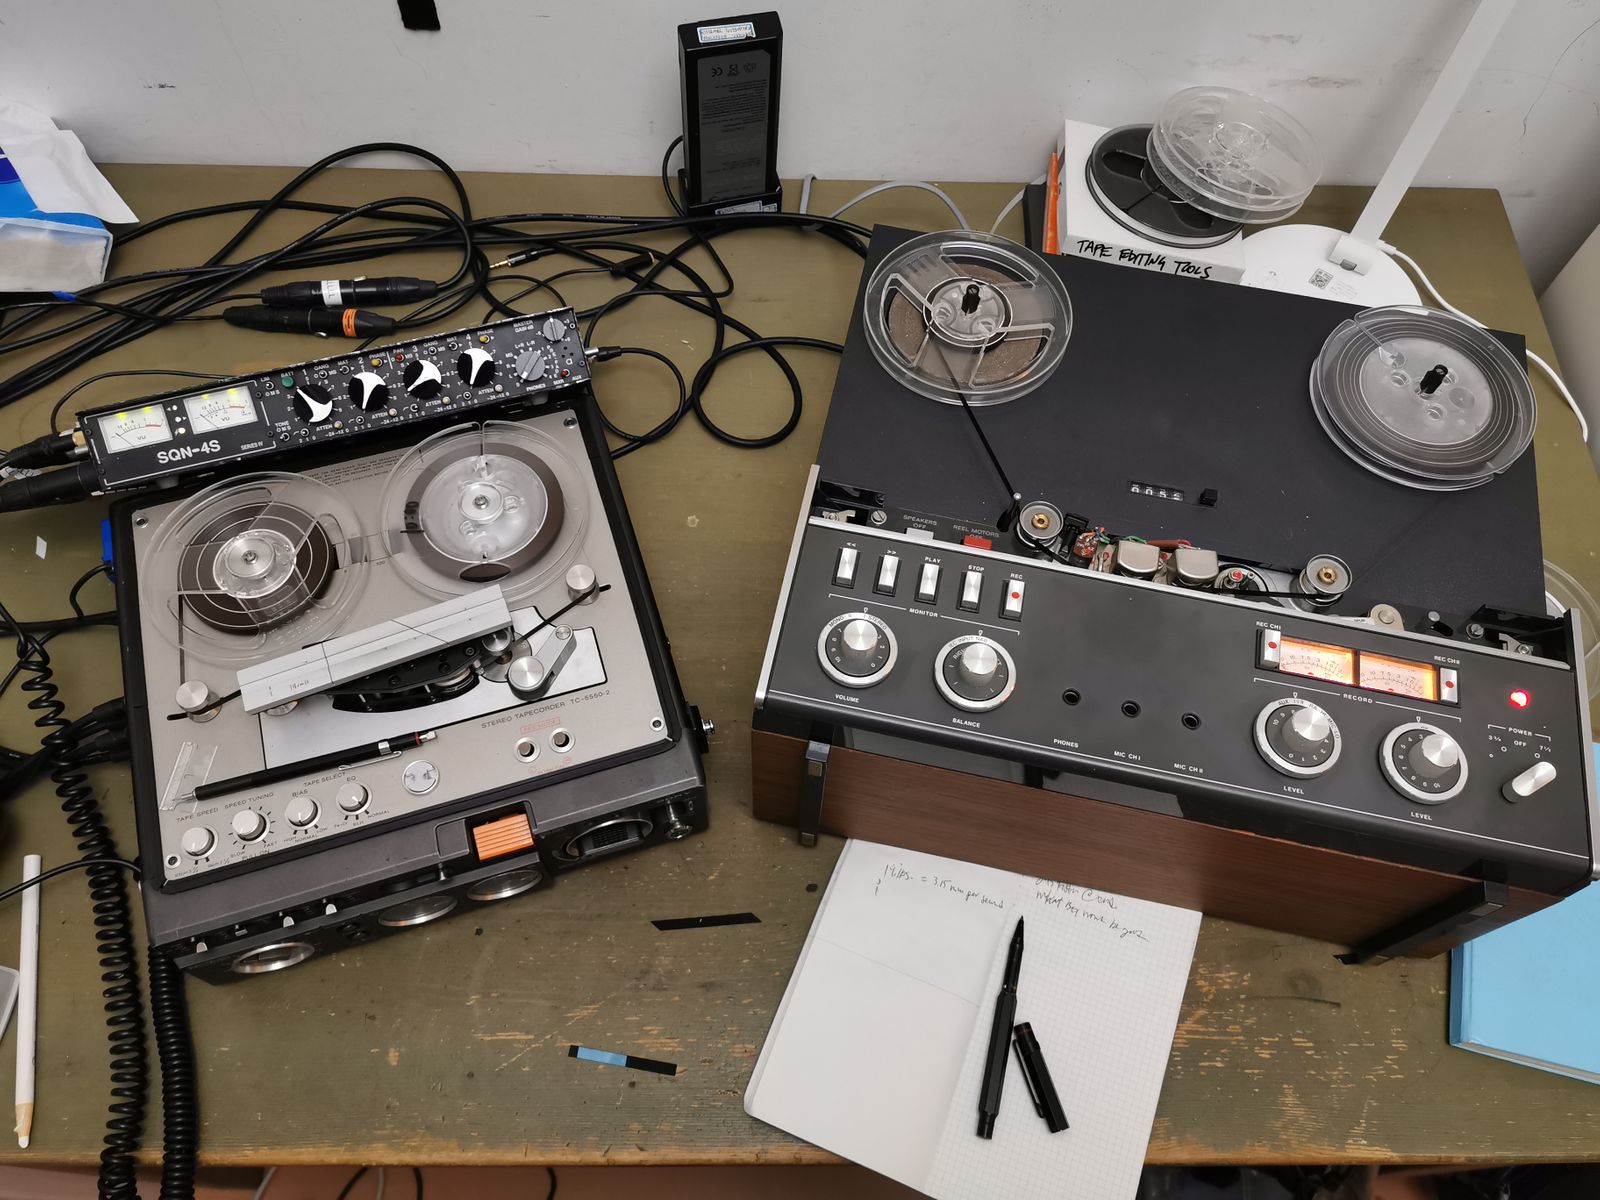
I began by using the tools I had right in front of me. Namely my A77 IV, Sony TC-5550-2, and SQN mixer. I made new cables to connect it all up and tried to 'play' it. It was far from ergonomic mostly due to the limited routing capabilities of the mixer and reel size of the Sony so I quickly grew out of it.
Problem #2: Too small, inefficient
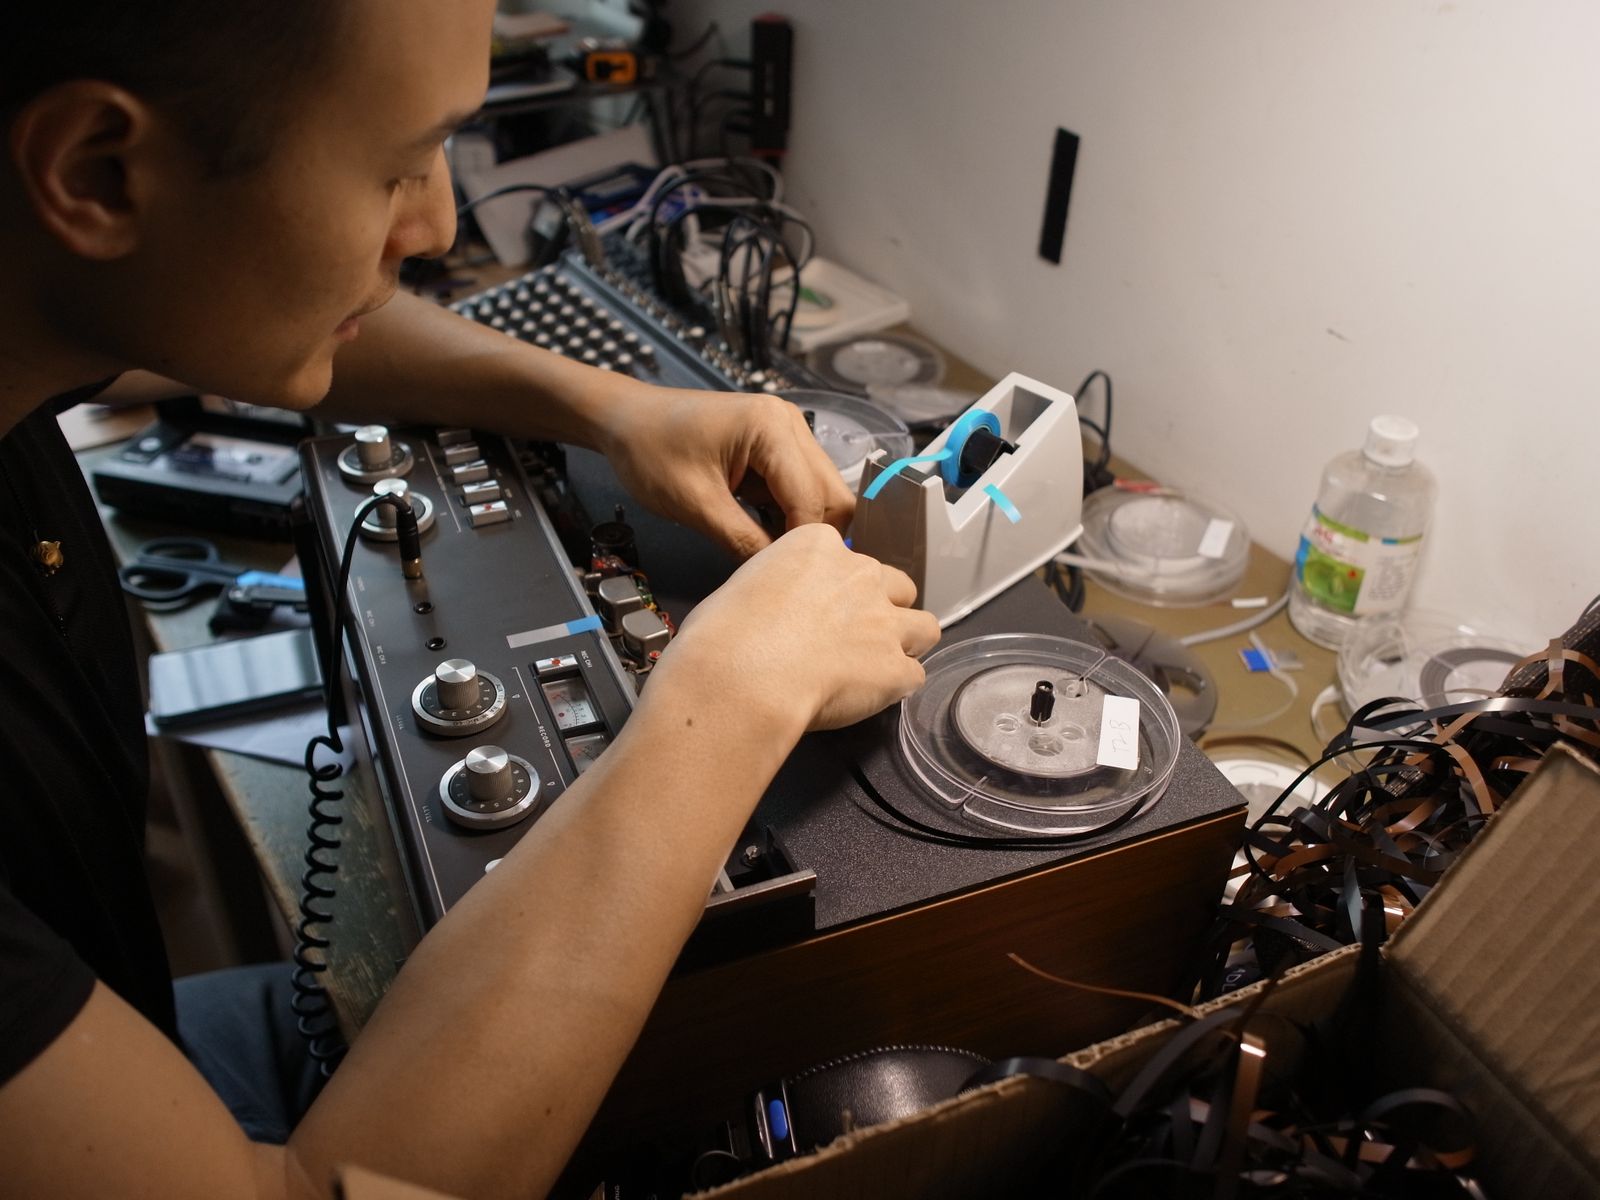
During this time, I also began to experiment with splicing tape and the different sounds it can yield. It was slow at first getting used to it again. But after a while it became a somewhat relaxing experience for me. I recorded a track to tape then I cut it up with scissors at random lengths then spliced it back up again. The random effect of the playback was interesting just by itself- a reinterpretation of a linear event. Playing back two respliced tapes really was more interesting because the edits would fall in and out of making sense with each other. It created a unique rhythm from both the splices and the audio, purely by chance. It was a random sharing of a single experience. I thought about how amazing this would sound if this was bigger. So I thought bigger. A lot bigger.
Components
All the components were selected not only for their function but also how it could be used to make the same sound I had in my head- or something completely different. Ergonomics were also important and how it would fit into my workflow.
There has been many modifications and custom programming for some elements. For brevity, I will talk a bit about each component and leave the intricacies out for later posts.
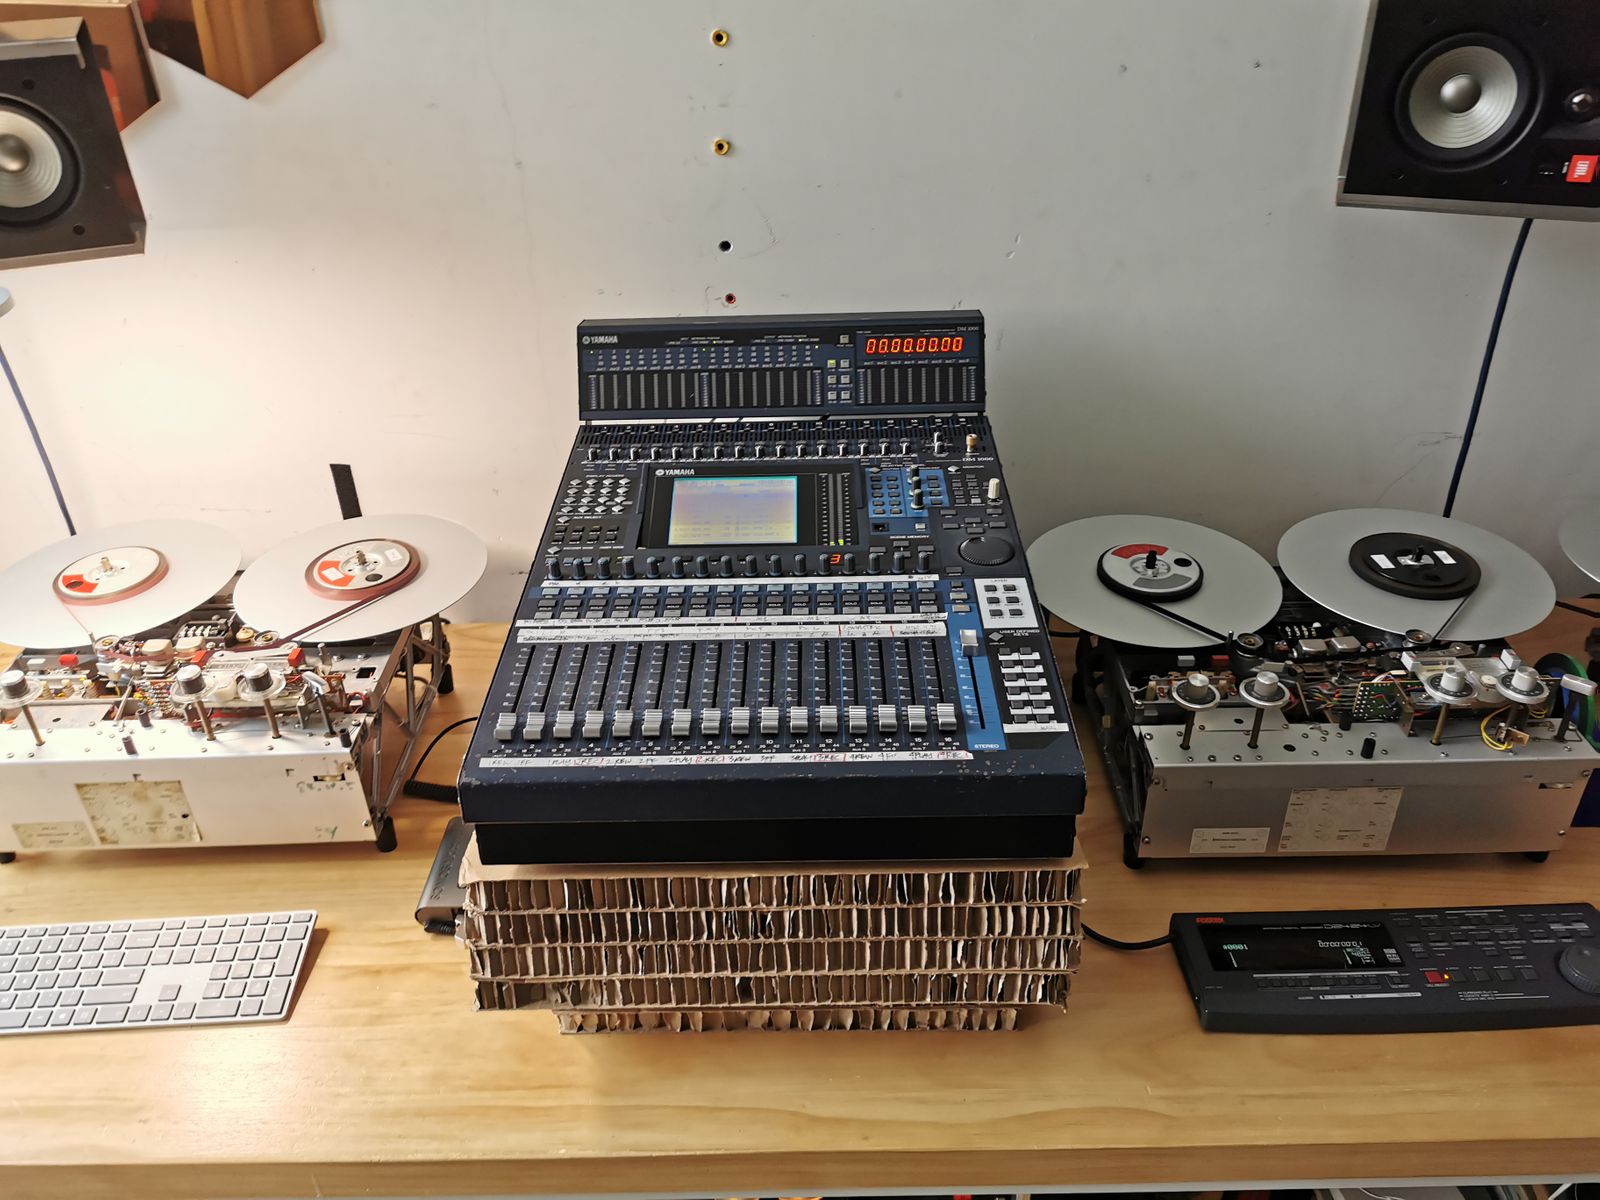
Yamaha DM1000
Behold, the Heart. The single thing that gives this instrument life. Ever since I saw it in a magazine in 2004 I wanted to get my hands on the DM1000. It was compact, powerful, and beautiful. It had everything I needed such as an infinitely flexible routing matrix, internal effects, automation, and an extensive, expandable I/O. In one machine, it single-handedly took the place of a (larger) slew of cables, external effects, a USB sound card and a DAW. Learning it and customizing it to the way you want to work is basically the biggest hurdle. Once you get over it though, it becomes second nature.
The DM1000 is an instrument itself and the center of my universe. It is responsible for all the functions and sound that comes in or out of it.
One thing that I realized is how great of a tool an external (digital) mixer is. As a test, I setup my native DAW to basically have the same routing functionality (8 mono tracks, 8 auxes on each track, 8 busses, and 4 effects) as the DM1000 and the CPU meter was already halfway filled without playing any audio. Playback through effects shot it right up to MAX. In addition, it would have been a nightmare to have as much 'live' control over the Auxes and Busses using any current MIDI controller on the market. I felt it was also a little 'buggy' and counter intuitive for this application.
I thought about using my DAW in a hybrid setup mixing out of the box then using plug-ins on my DAW but I encountered the same problems with routing and mapping controls using the DM1000 HUI layer. The DM1000 DAW control is ok but not great. I had bigger things in store for it. All in all, I felt that it just didn't promote an efficient workflow for an improvised performance. With the DM1000, I know that it is designed within its limitations, so I don't have to worry about CPU overloads or crashes (most of the time).
One of the main advantages of the DM1000 is that almost every function is controllable via MIDI. What this also means is that almost every knob, button, and slider, transmits MIDI messages. Um, so? SO that when paired with a MIDI translator software, you can have more MIDI controls than any controller on the market today in a single, rack mountable, albeit 20 kg, unit. More on this in a bit.
The catch is that I cannot really carry it with me everywhere (I could, though). However, I can make/change settings offline using the Studio Manager software. Also, Yamaha consoles are pretty much in every major city that has a professional rental company so renting one for the night in a different town shouldn't be too hard (fingers crossed). Just upload my settings to the unit and I am home again. One less thing to pay an overweight baggage fee for.
Additionally, I use a MY16AT ADAT card to route 16 channels of audio via the RME USB DIGIface and a MY8-AE to send tracks to the SPX2000 or any other future digital equipment.
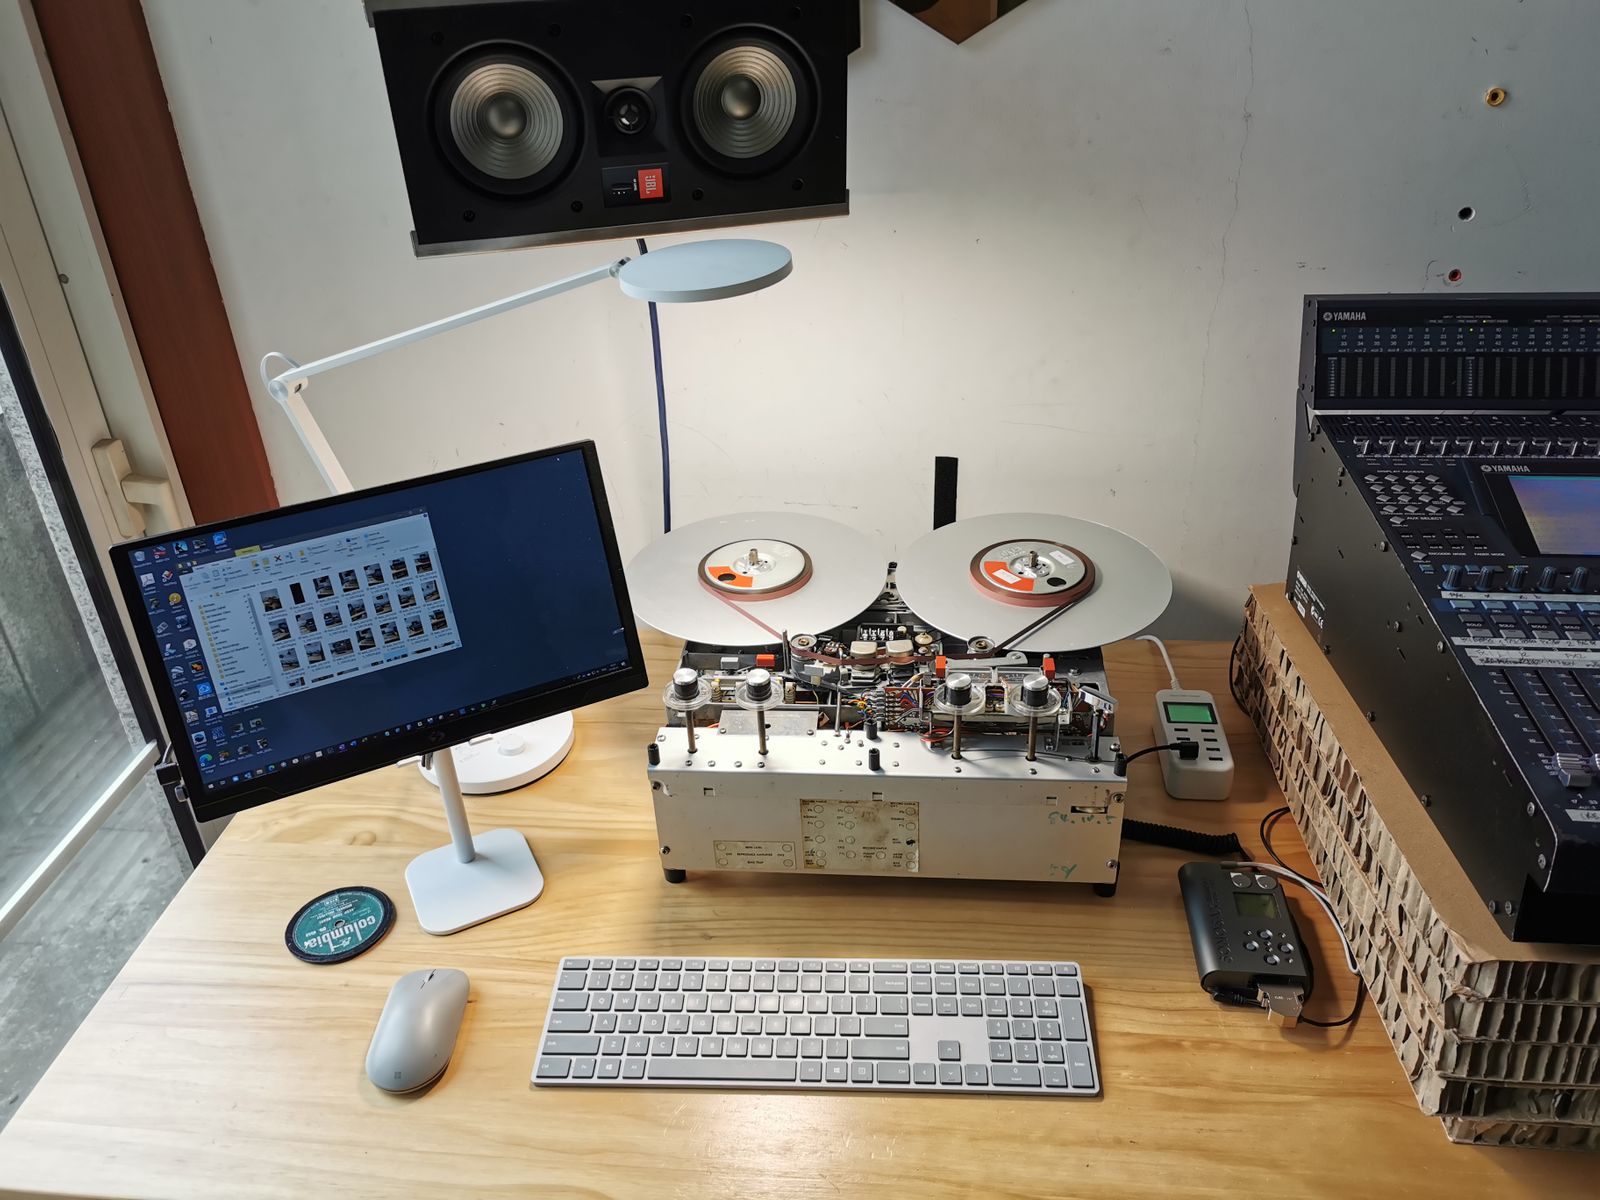
Revox A77
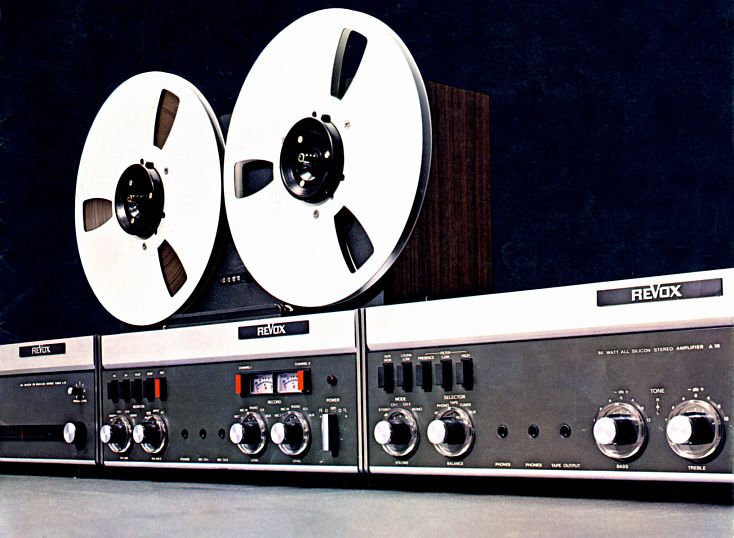
Ever since I saw the A77 I fell in love. It was compact, beautiful design, self-serviceable, great sounding recorder made between 1968-1976. There were hundreds of thousands made which means that parts are still available from old units and also from many individuals selling newly made parts. Also, you will not find another consumer tape deck with the amount of praise, specs, and support as this recorder.
My first unit I bought over 6 years ago and was greatly underused until I started my Flow/Flux project. It was OK for just playback but more units would allow more layering for added depth and live recording. I figured that I could fit at most 4 units in my studio, so that was my limit and really as much as I could control by myself.
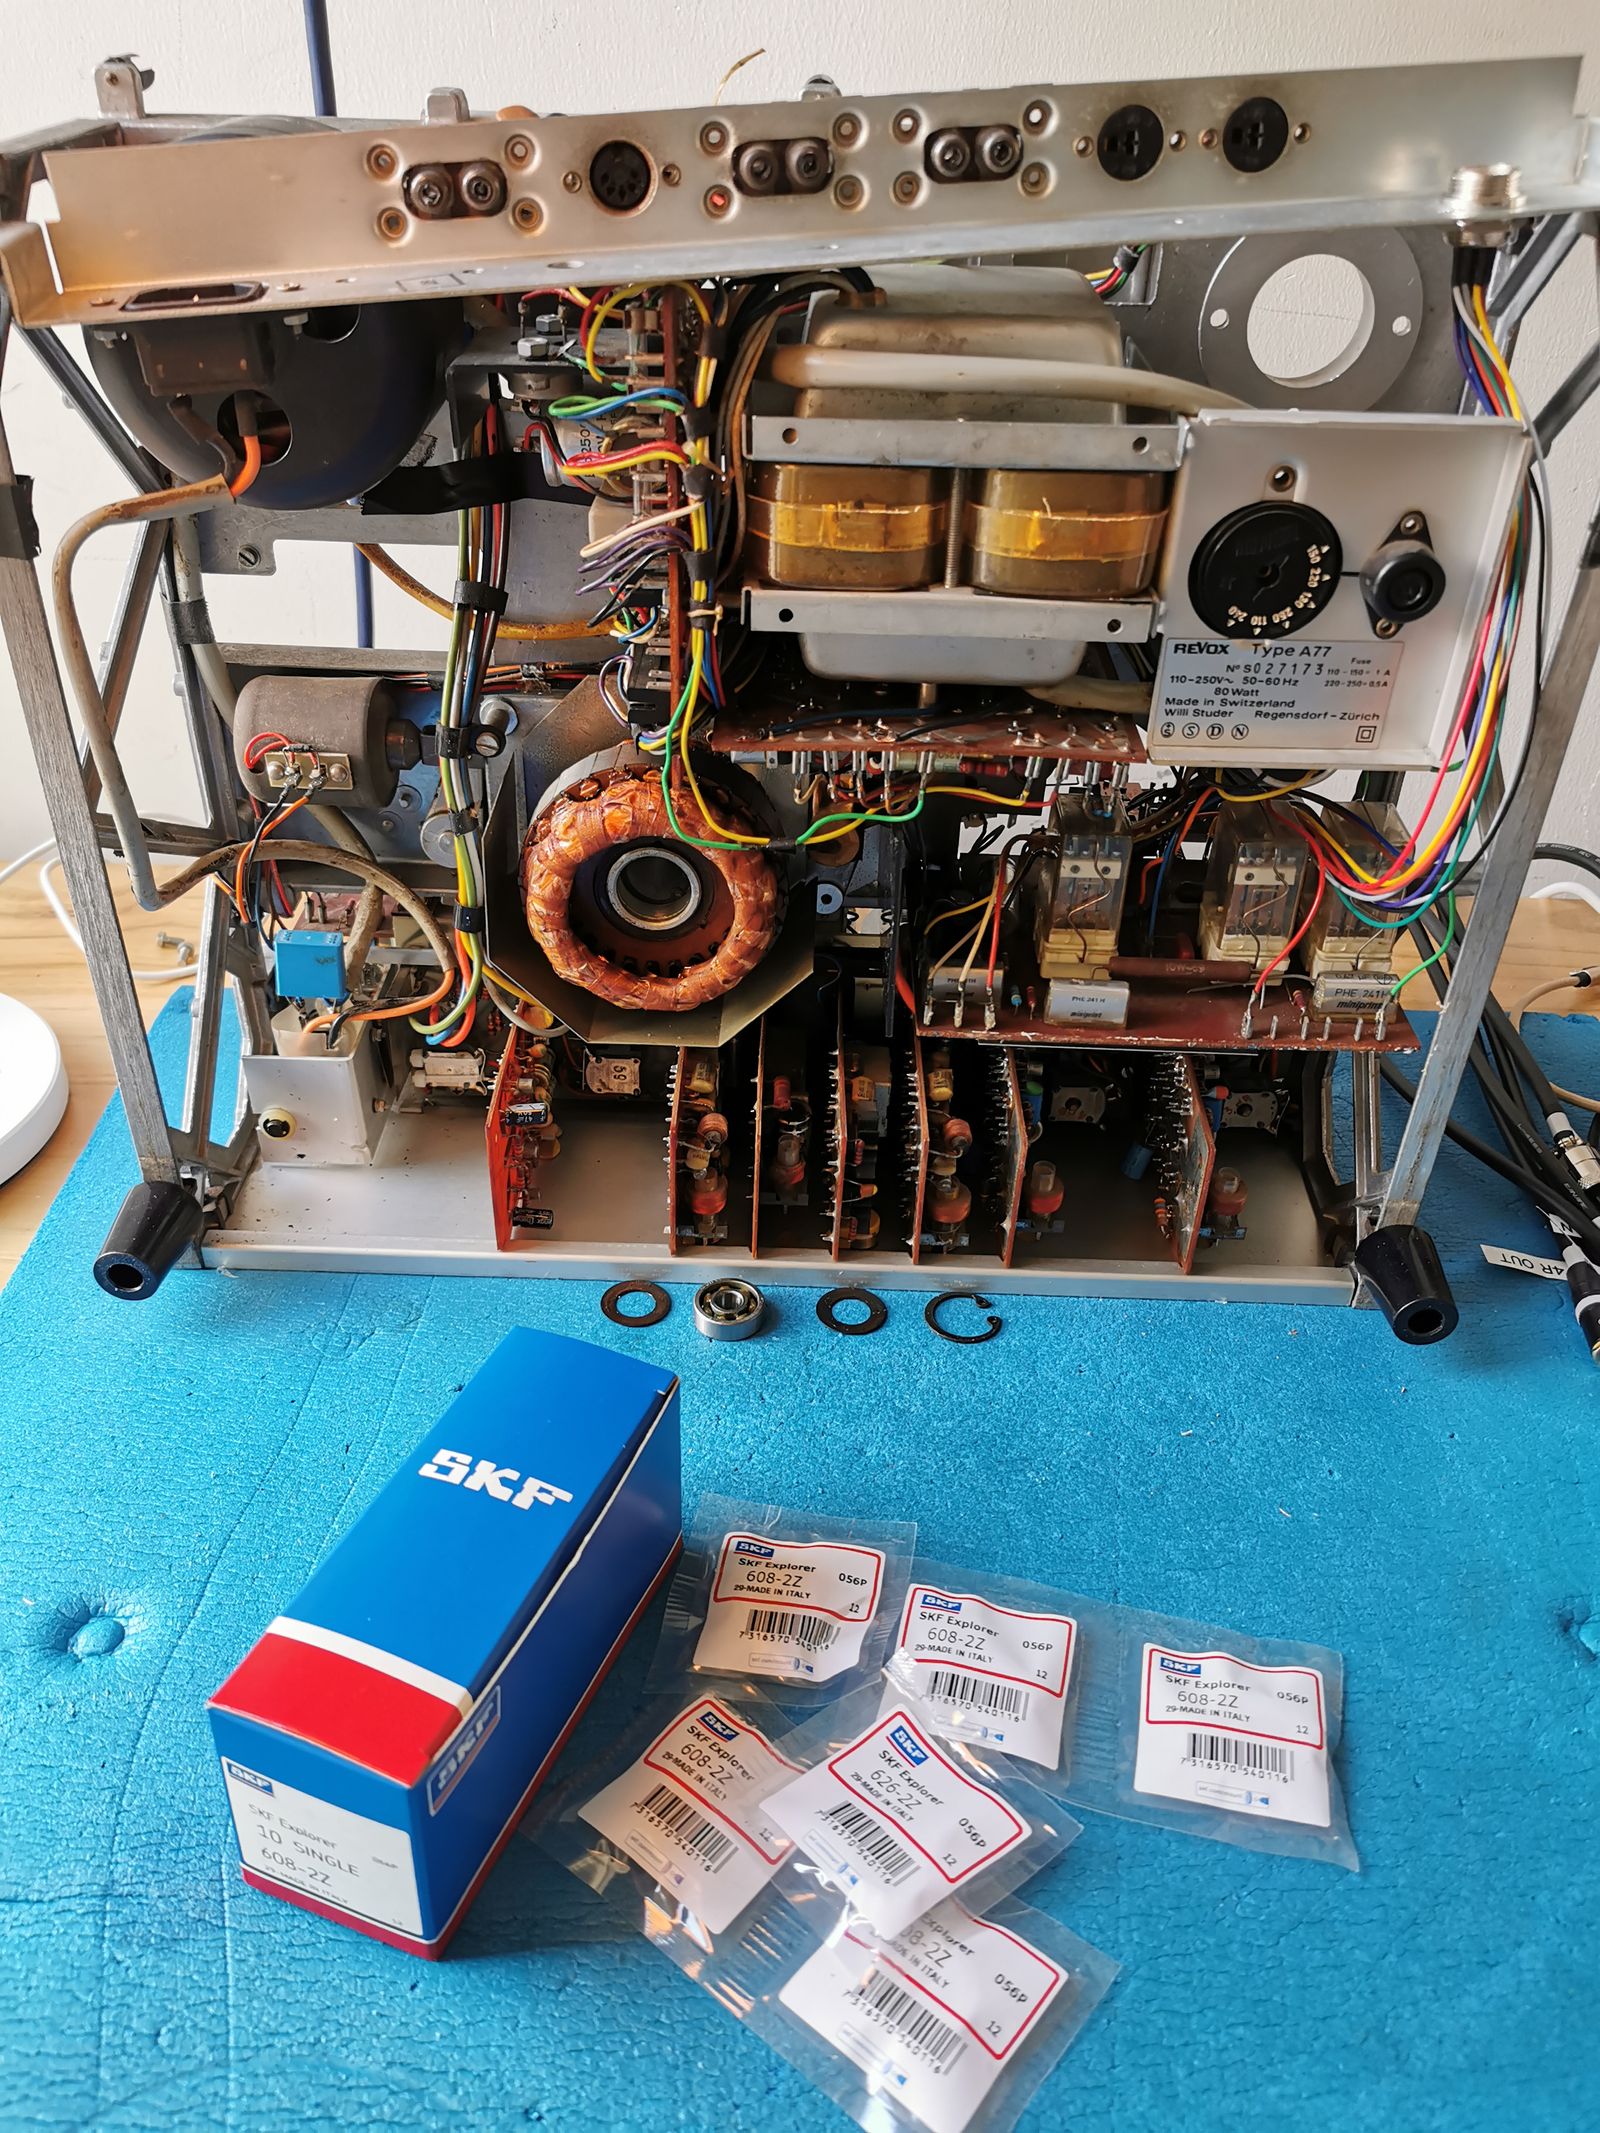
Buying an old unit is really hit or miss. There is bound to be some problems with it especially after 60+ years of life. But it can be fixed! It just takes some time to look over the service manual and asking questions on forums like Tapeheads.net . The repairs I made are quite a few so I will leave it for later posts.
[One recent repair: changing 50-year old motor and capstan SKF bearings with lovely new ones.]
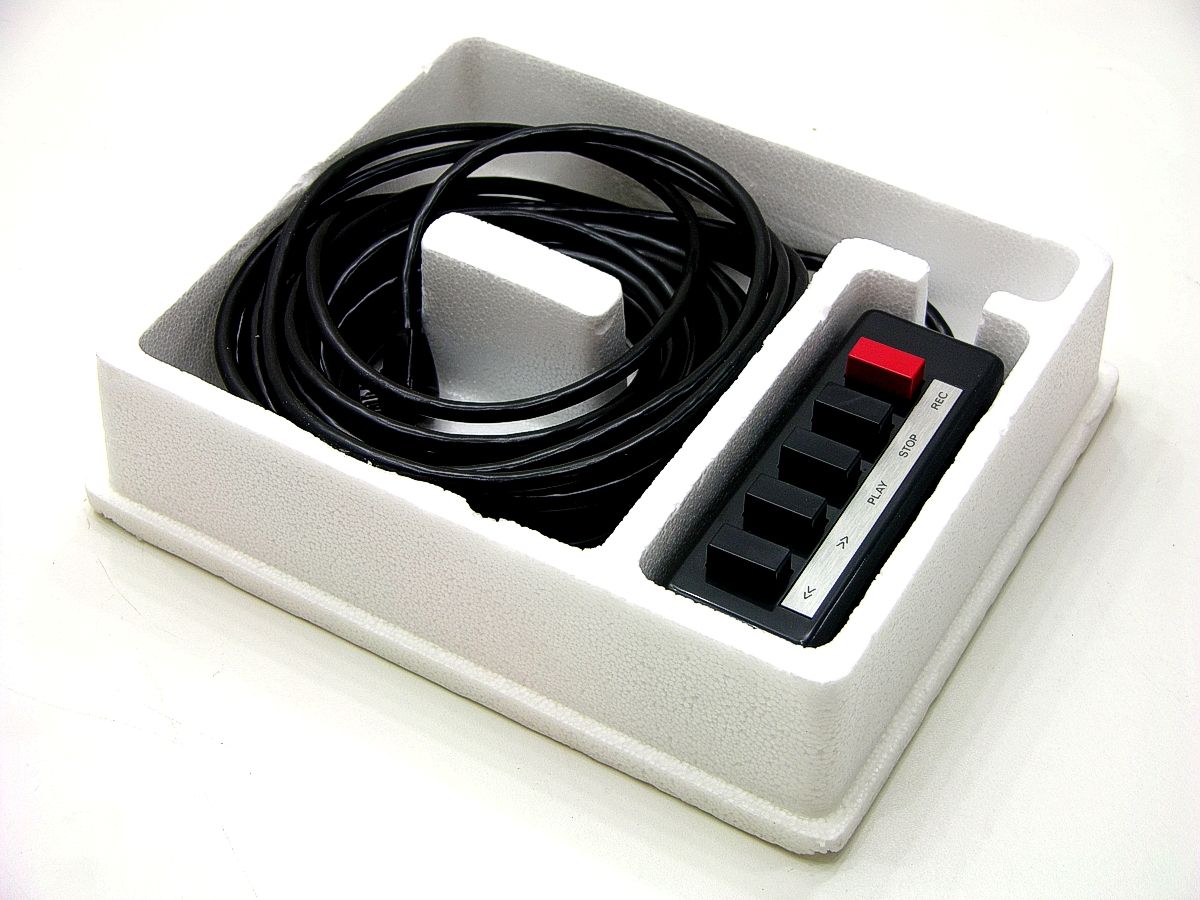
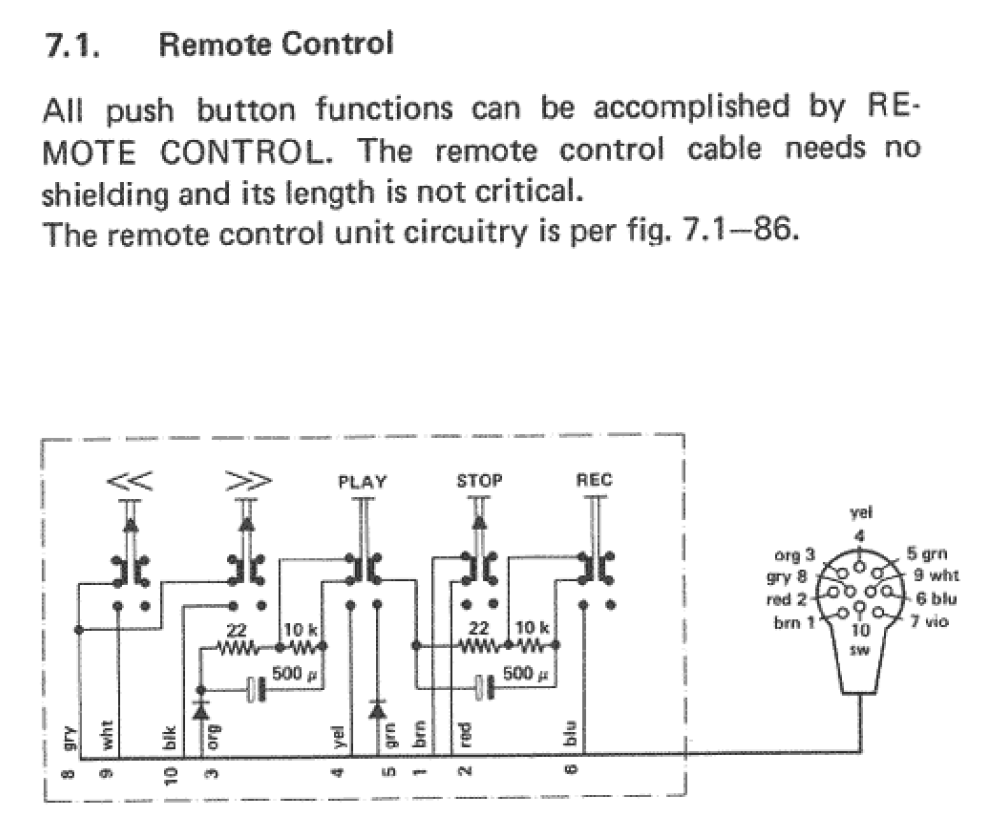
The main thing about the A77 that caught my attention is the REMOTE port. The A77 can be 'remote' controlled via a little external box that controls the relays in the unit. Which got me thinking:
"Wouldn't it be great if I could control the A77 with MIDI messages?" Hmmm.
More on this later.
Each Revox unit has its own characteristic sound and markings. The machine-like Ka-Chunk! Click! Whirrrrr! Click ! Ka-Chunk! sound of the machines are also meant to be a part of the performance. Some of the reel motors have the date of manufacture on them. Some are made in Switzerland and others in West Germany. Other stamps and markings indicate service dates and QC markers. The dirt and grime also tell a story. If these things could talk...
More on my modifications and repairs in a later post.
The Rack

Yamaha SPX2000
The DM1000 has 4 internal effects that contain your basic suite of studio FX. However, I wanted just a little bit more flexibility and a more updated FX palette. I also wanted to try to stay in the digital domain to/from the mixer. I would have loved an Eventide unit but until I have the money, I settled for a pair of SPX2000 units to keep its space warm for the moment (please don't tell them). Giving me a grand total of 6 stereo effects that I can route however which way I want to: serial/ parallel/ individual. Using the AES I/O everything goes in and out flawlessly digital and sounds great. Again using MIDI translator software, I can control any parameter. The Yamaha Studio Manager program can also help me edit and organize FX as I need. Cheap, digital, and easy to setup. Why not?
They were so grimy when I got them (you get what you pay for. I got mine for $150 each). One was definitely used in a bar and had a major rust problem, the other was probably kept in a forgotten dusty storage rack somewhere. I opened them up and the power supply capacitors were still ok and some button contacts needed cleaning. I gave them a good clean and gently put them into racks good as new.
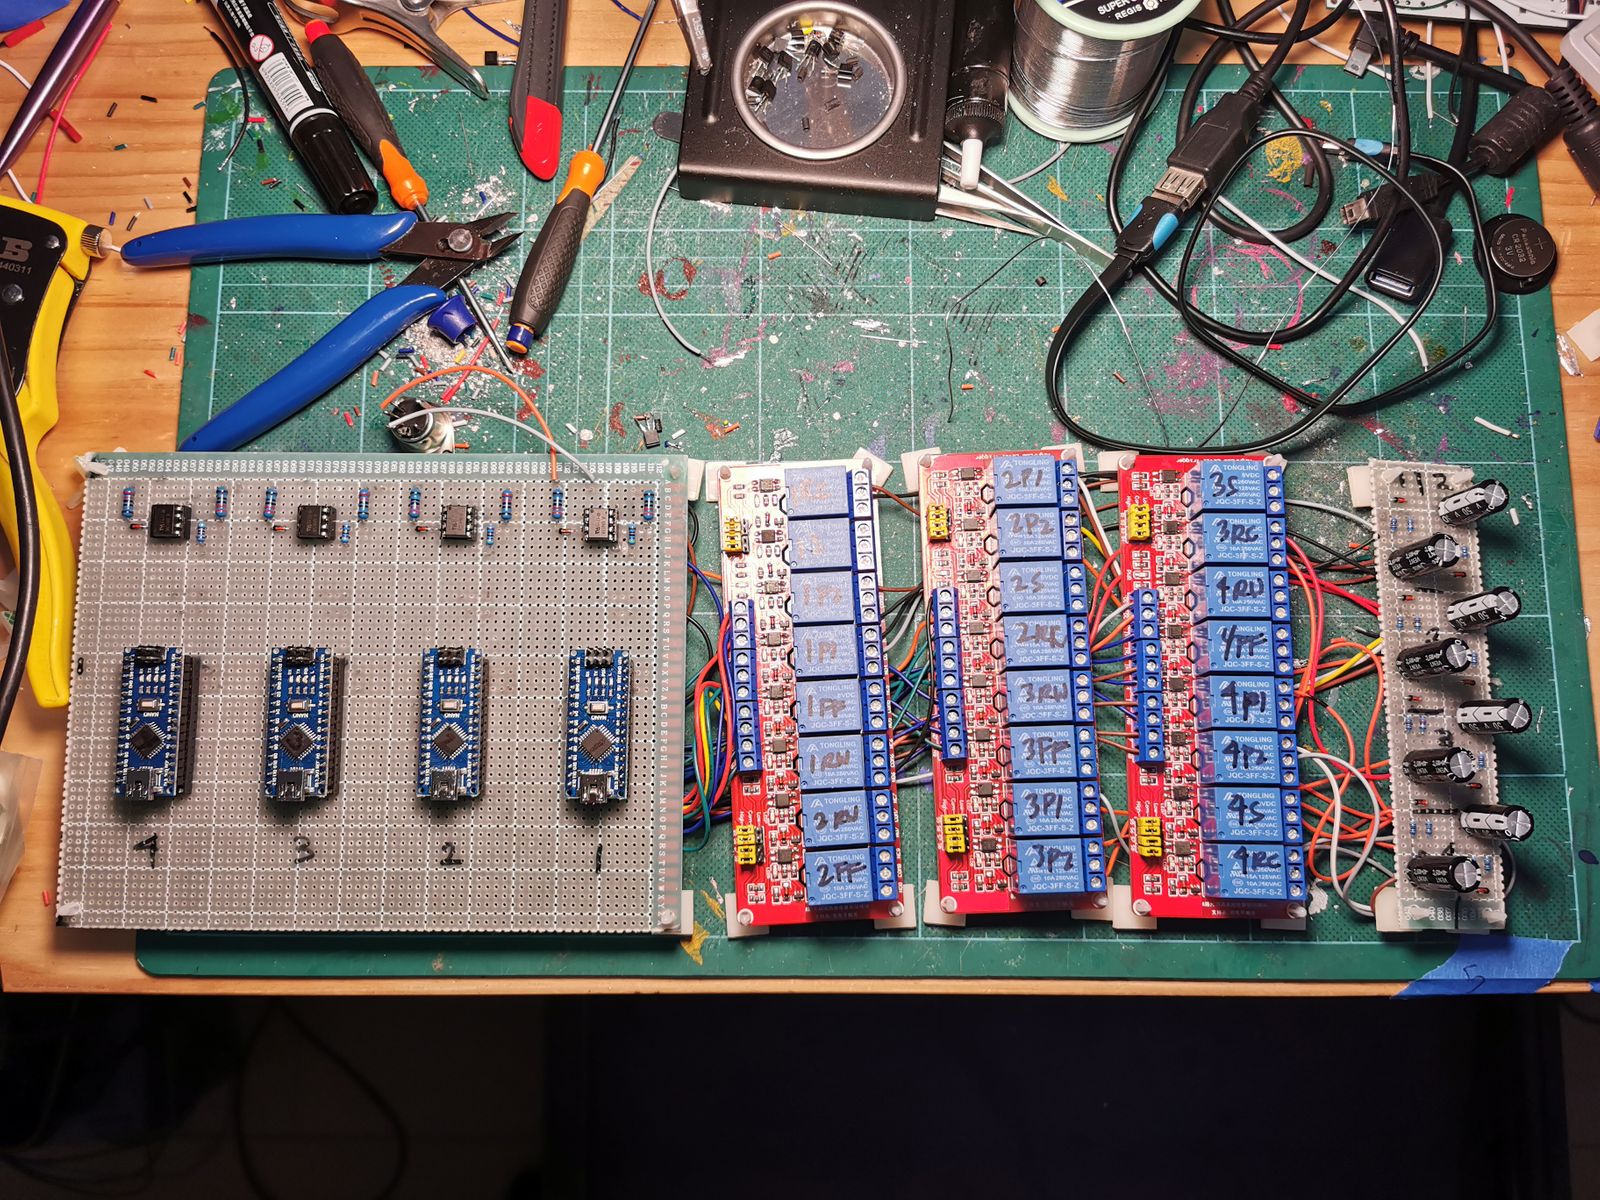
Midi controlled relay box / Arduino

Ah, the pièce de résistance. There really is no off-the-shelf solution for this one can buy. It is such a custom application that you just have to dive in and make a 1 of 1 piece of art. Holding my breath, I scoured the Arduino user forums and Youtube until I found a short video of someone who made a MIDI controlled relay bank using an Arduino. And the rest is history. My code is not the best but it works. I am sure someone can make a more streamlined version. I couldn't quite understand the ARRAY function so I just did it the long, drawn out, newbie way. Hey, whatever works.
The Revox remote control is basically a small external box that is a copy of a part of the control board inside the unit. When a button is pressed it completes a circuit which activates the relays inside of the box from a remote location. Learning to read a schematic came much easier than coding but eventually I was able to combine the two and make several breadboard prototypes, each one with more complexity.
[Original Revox remote]
[Remote schematic]
[Phase 1 video: Control of A77 with preprogrammed code activating a relay bank to control all transport functions of the A77. ]
[Phase 2 video: Using MIDI from my DAW to the Arduino to control a relay bank.]
[Phase 3: Final Bread board working prototype]
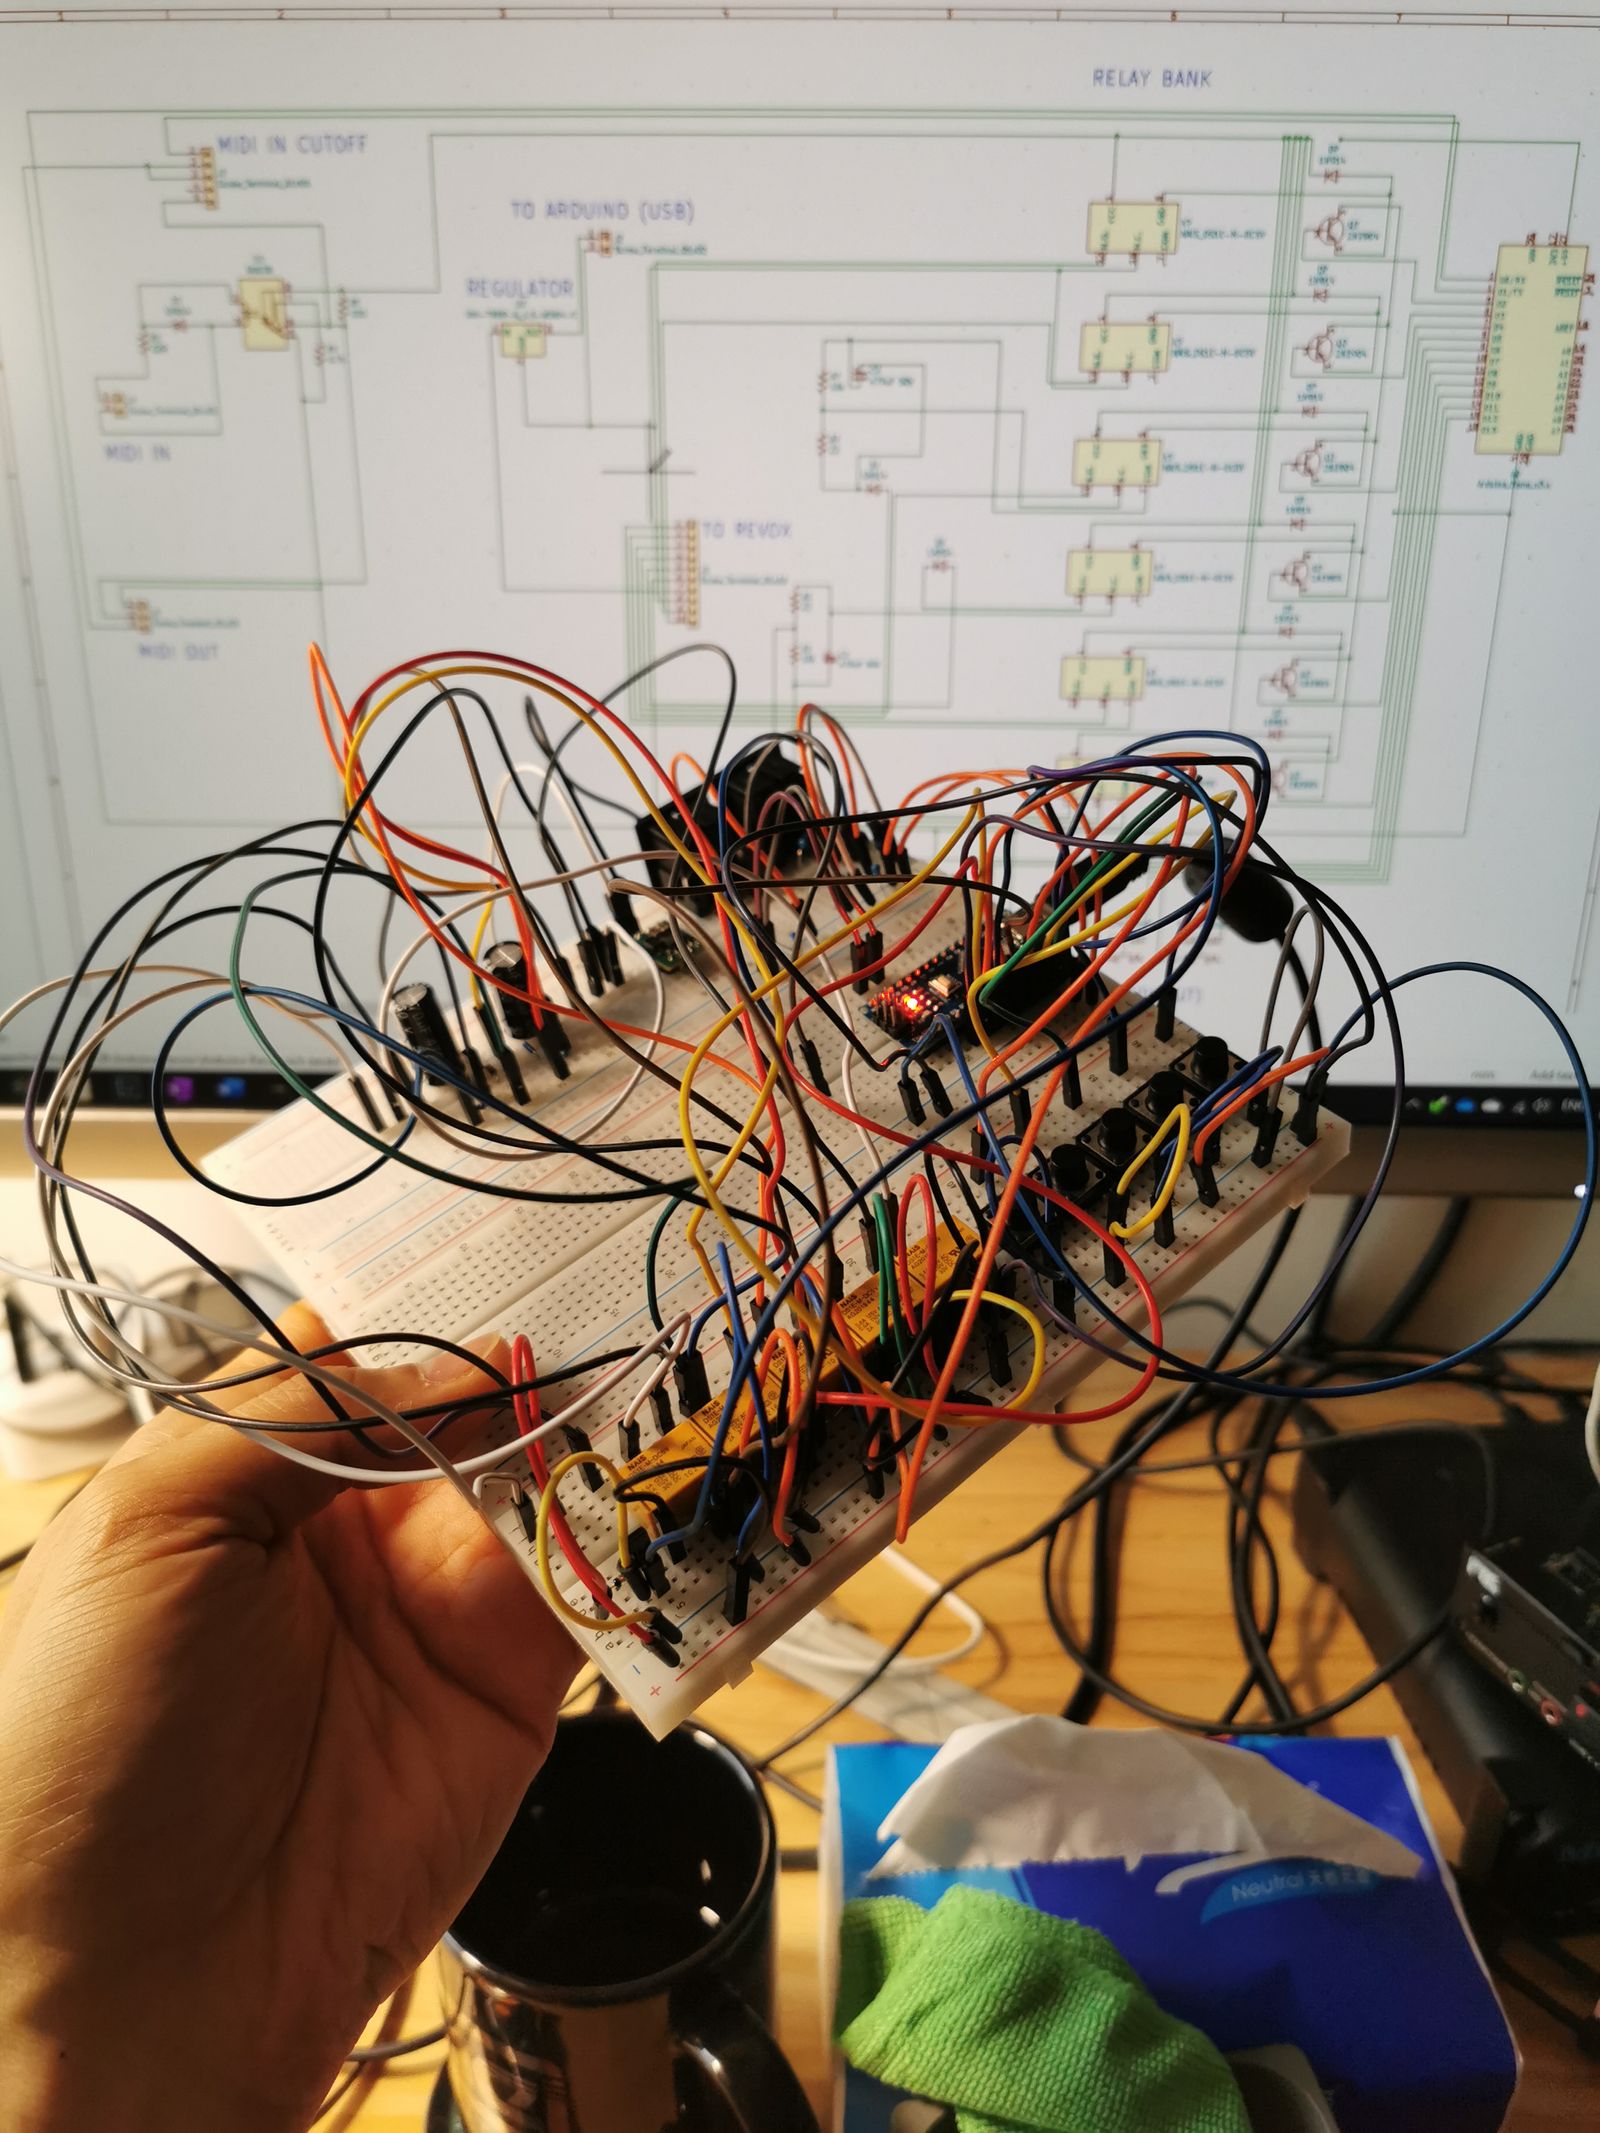
This was by far the most tedious part. Between sourcing parts, buying tools, components, and equipment, then waiting for it to come, then finding out it didn't work/ needed more... Well, it took a long time. I should make a shopping cart to show what equipment I bought.
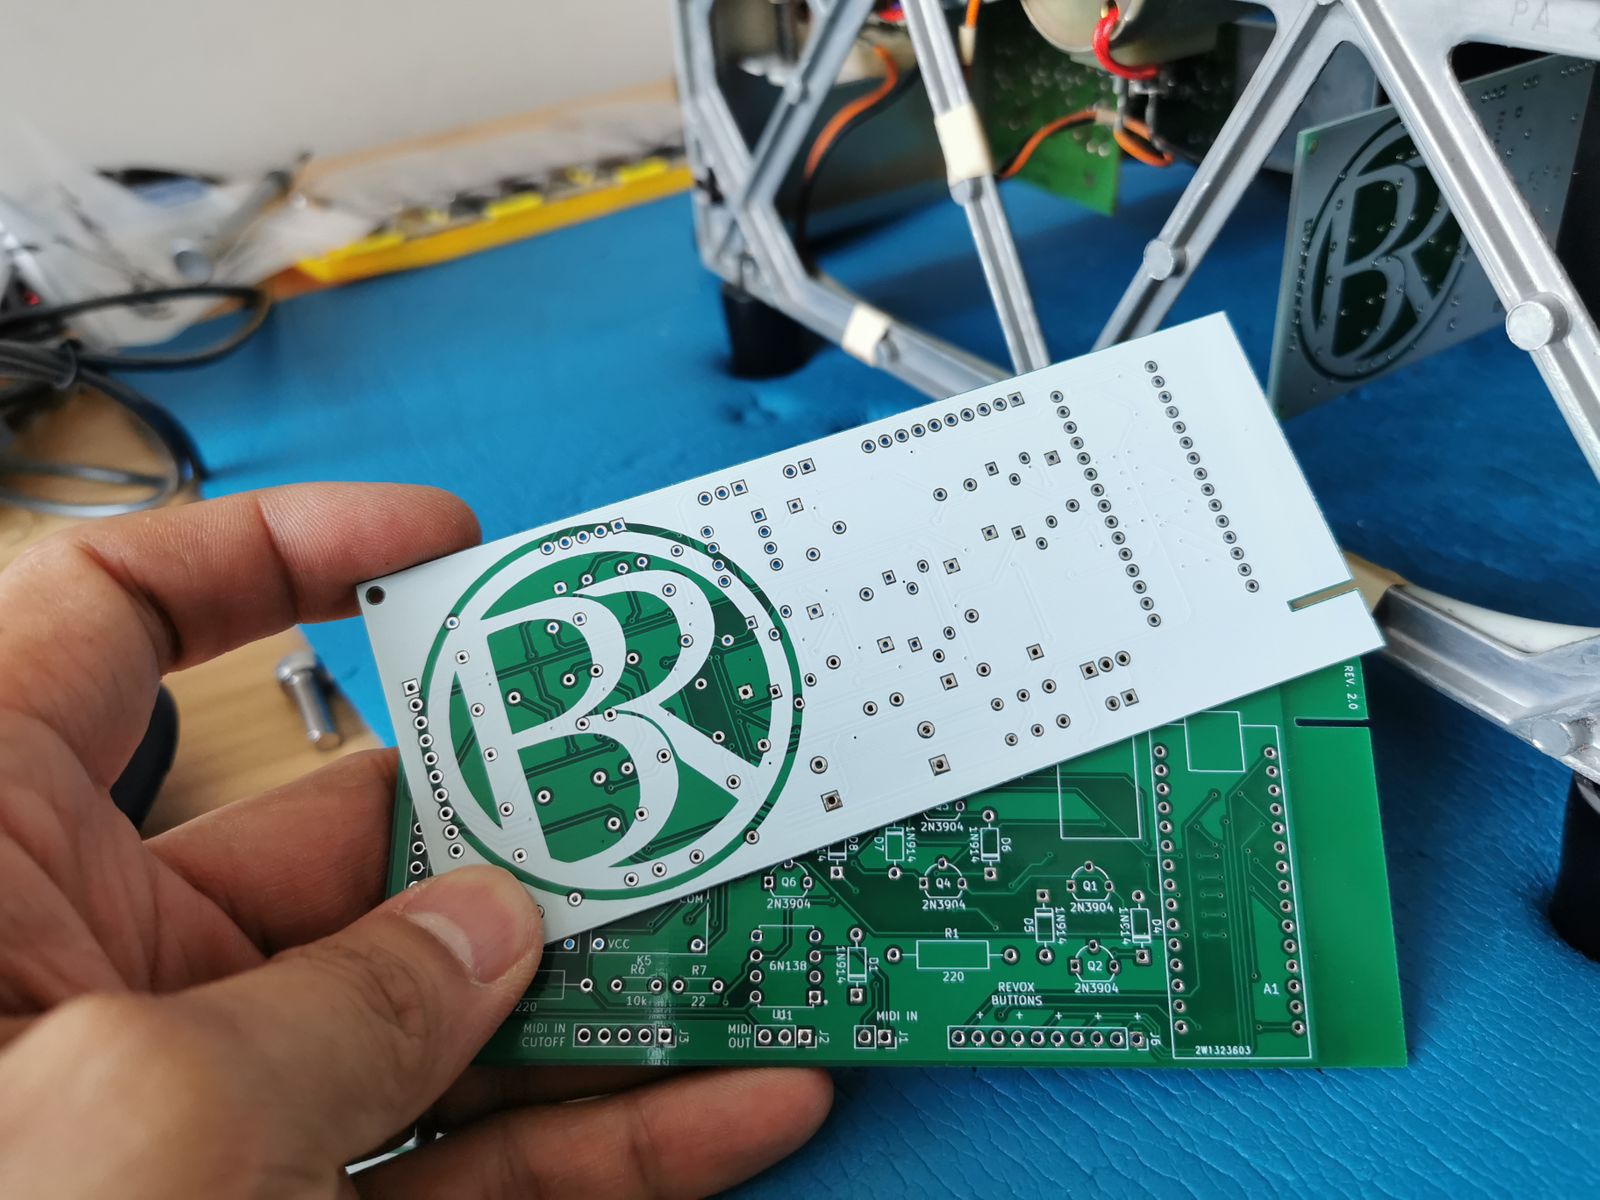
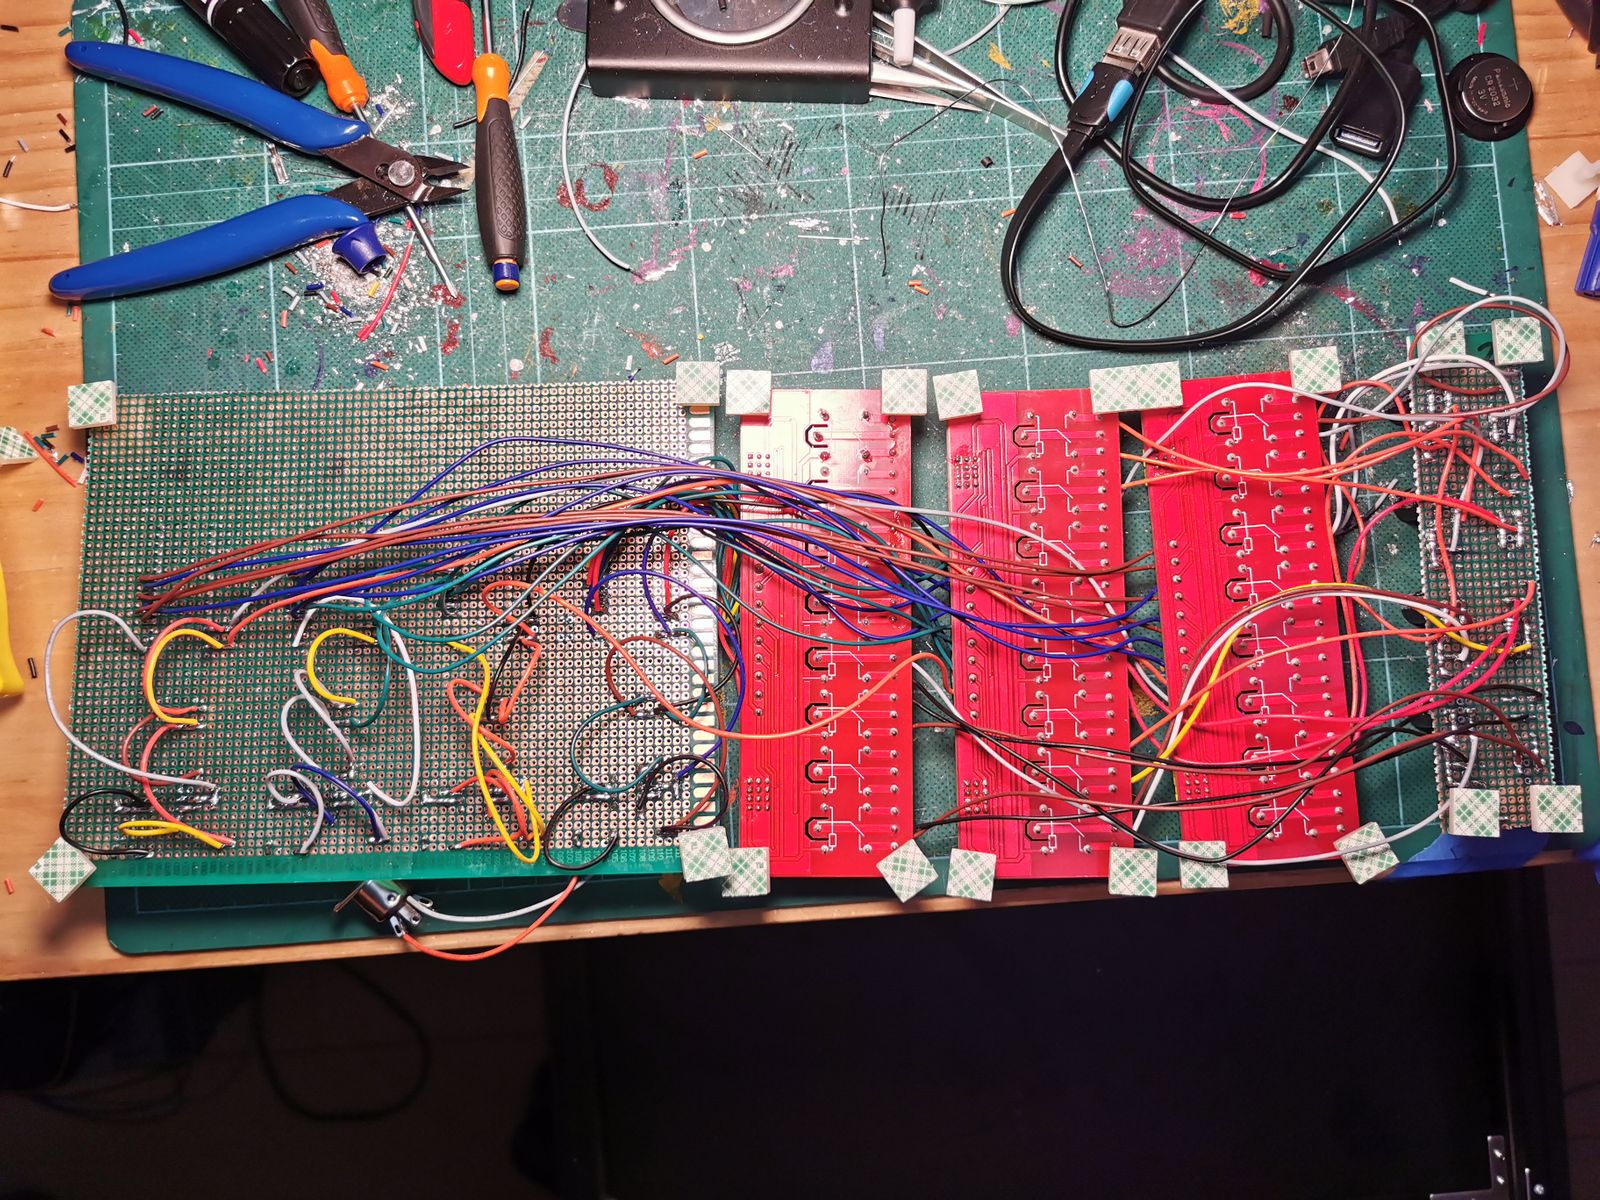
Ideally, each A77 was to have a PCB that has its own relay board. This would have been the most elegant solution. I went so far as to teach myself KiCAD and designed AND had PCBs printed. This was something that was right up my alley, taking me back to my AutoCAD days. I had three versions made but none of them worked for reasons beyond my expertise. I used the same components as the breadboard so it must have been something with the traces. Anyway, this took about a month before I gave up that idea and resorted to a large scale foolproof version of the PCBs.
[Proposed PCB location.]
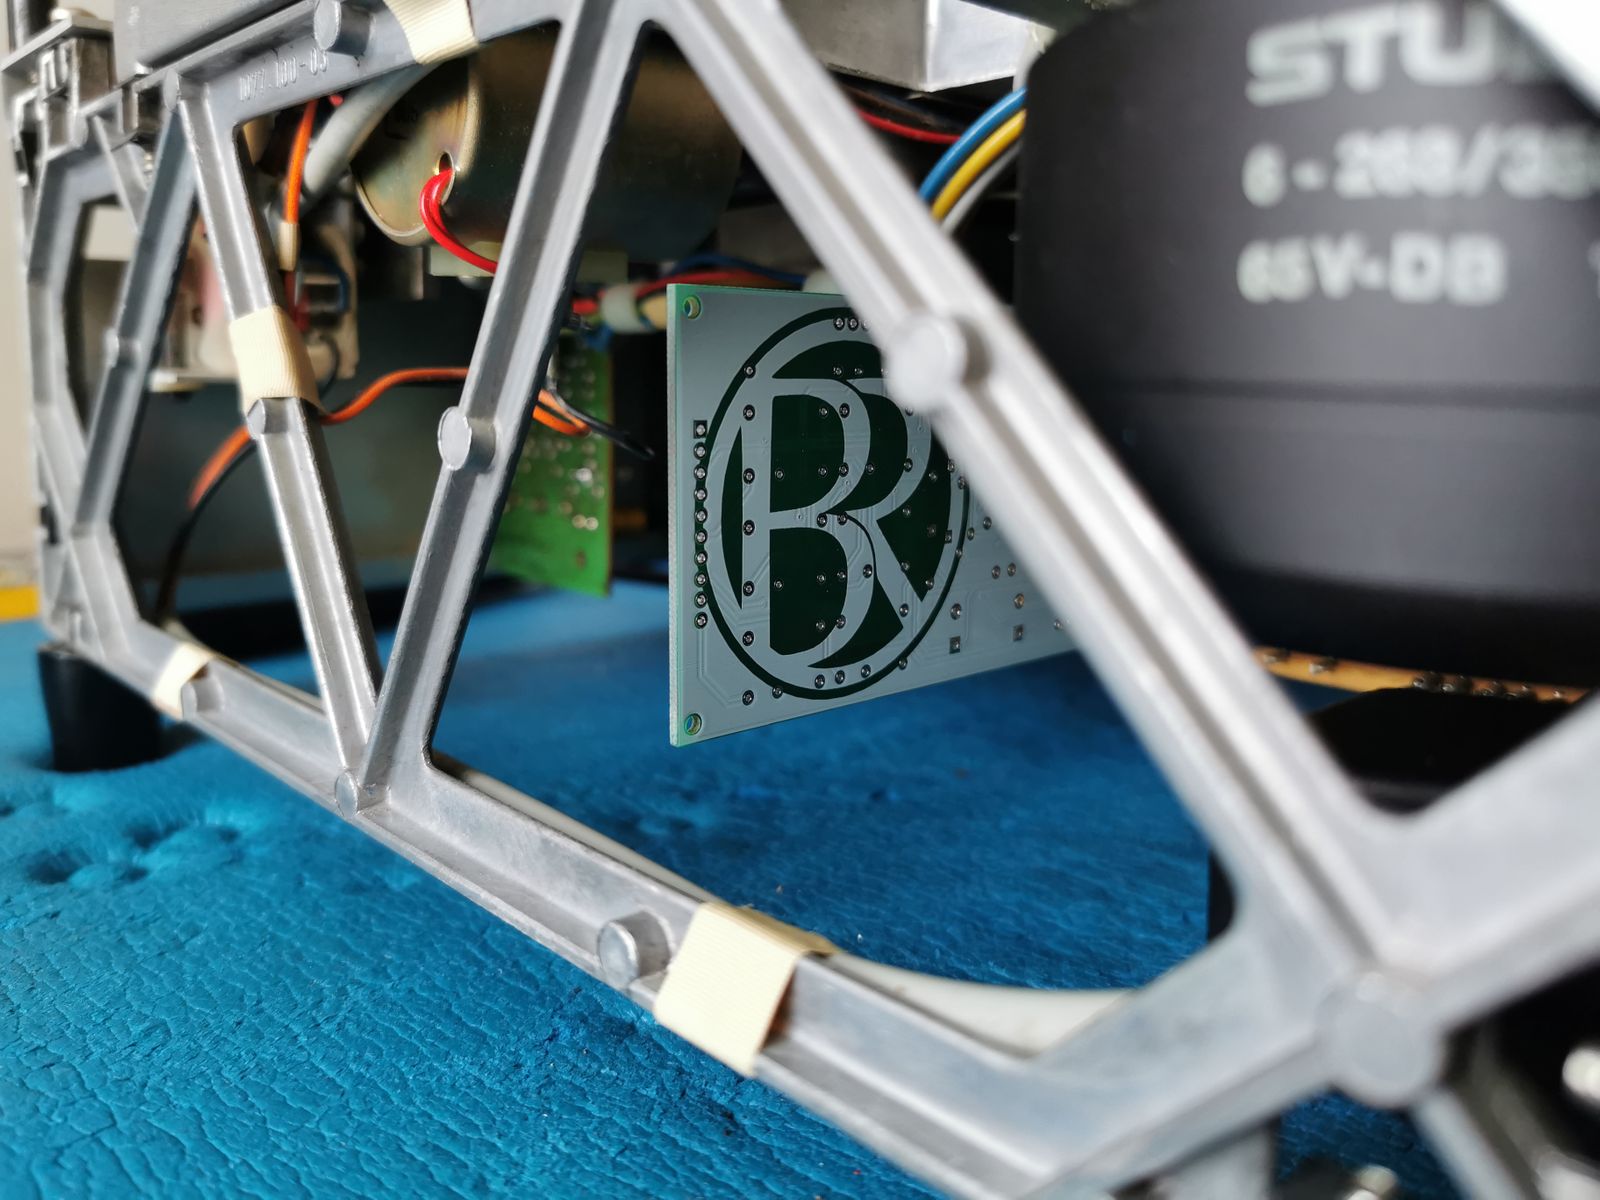
[These would have been great to use. Maybe next time.]
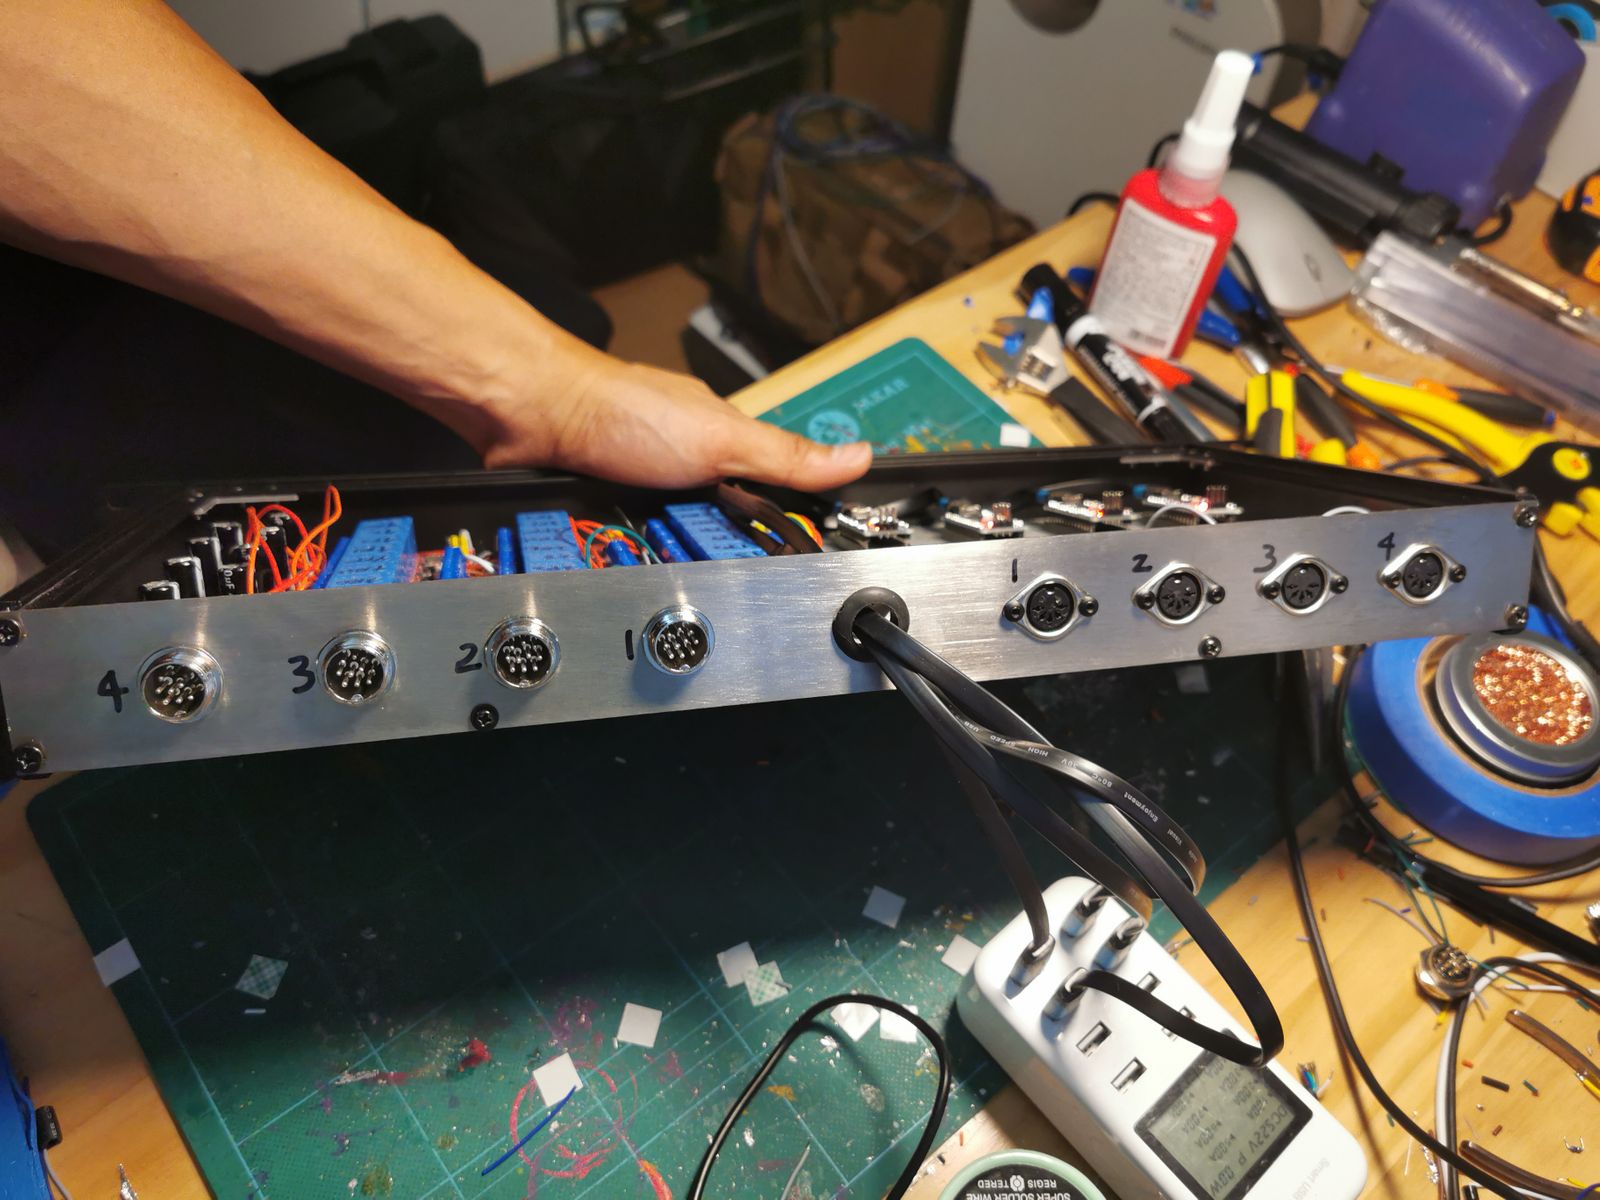
After two versions, I finally got the hang of soldering the prototype board that i completed in about a week thanks to my new skills. If there is a problem, yo I'll solve it. It was much easier to find the problem and resolder it, unlike a PCB. I bought a 1U empty rack box and stuffed it all in.
[Business up front...]
[...Party in the back.]
[New 10-pin remote connectors on the left, MIDI on the right.]
To be continued...